Scaleway acquires Qarnot to strengthen its European Cloud & AI platform
Read more

Lorem ipsum dolor sit amet, consectetur adipiscing elit, sed do eiusmod tempor incididunt ut labore et dolore magna aliqua. Ut enim ad minim veniam, quis nostrud exercitation ullamco laboris nisi ut aliquip ex ea commodo consequat. Duis aute irure dolor in reprehenderit in voluptate velit esse cillum dolore eu fugiat nulla pariatur.
Block quote
Ordered list
Unordered list
Bold text
Emphasis
Superscript
Subscript
LS-DYNA is an advanced numerical simulation software, specialized in the explicit and implicit analysis of structures subject to complex dynamic stresses. It is particularly recognized for its capabilities in automotive crash testing, impact, fall, explosion and other transient phenomena with high non-linearity.
Engineers, researchers, and designers use LS-DYNA to model the behavior of materials and structures under extreme conditions in order to optimize the safety, reliability, and performance of designs. The software uses the finite element (FE) method to solve highly nonlinear equations, allowing real phenomena to be accurately reproduced and providing essential support for engineering decision-making.
To launch an LS-DYNA simulation on Qarnot, you need to allow us to access your license. For more details, please contact our team via support-compute@qarnot-computing.com.
From now on, we'll assume that your license setup with us is already complete.
Here are the versions currently available on Qarnot:
If you are interested in another version, please email us at support-compute@qarnot-computing.com.
Before starting a calculation with the Python SDK, a few steps are necessary:
Note: in addition to the Python SDK, Qarnot also offers SDKs for C# and Node.js, as well as a command line (CLI).
This test case will show you how to launch the Drop Test model: EXP_SC_DROP.key. It comes from Ansys website.
Once the file is downloaded, place it in a directory called dyna_drop_test.
Once everything is set up, use the run-ls-dyna.py script below to start the calculation on Qarnot.
To start the calculation on Qarnot, save the code above as a Python script in your working directory. Before running it, be sure to update the following constants at the start of the script:
Once done, the structure of your files should look like this:
├─ dyna_drop_test/
│ ├─ EXP_SC_DROP.key
├─ run-ls-dyna.py
To launch this script, simply run python3 run-ls-dyna.py in your terminal.
You now know how to launch an ls-dyna task on Qarnot!
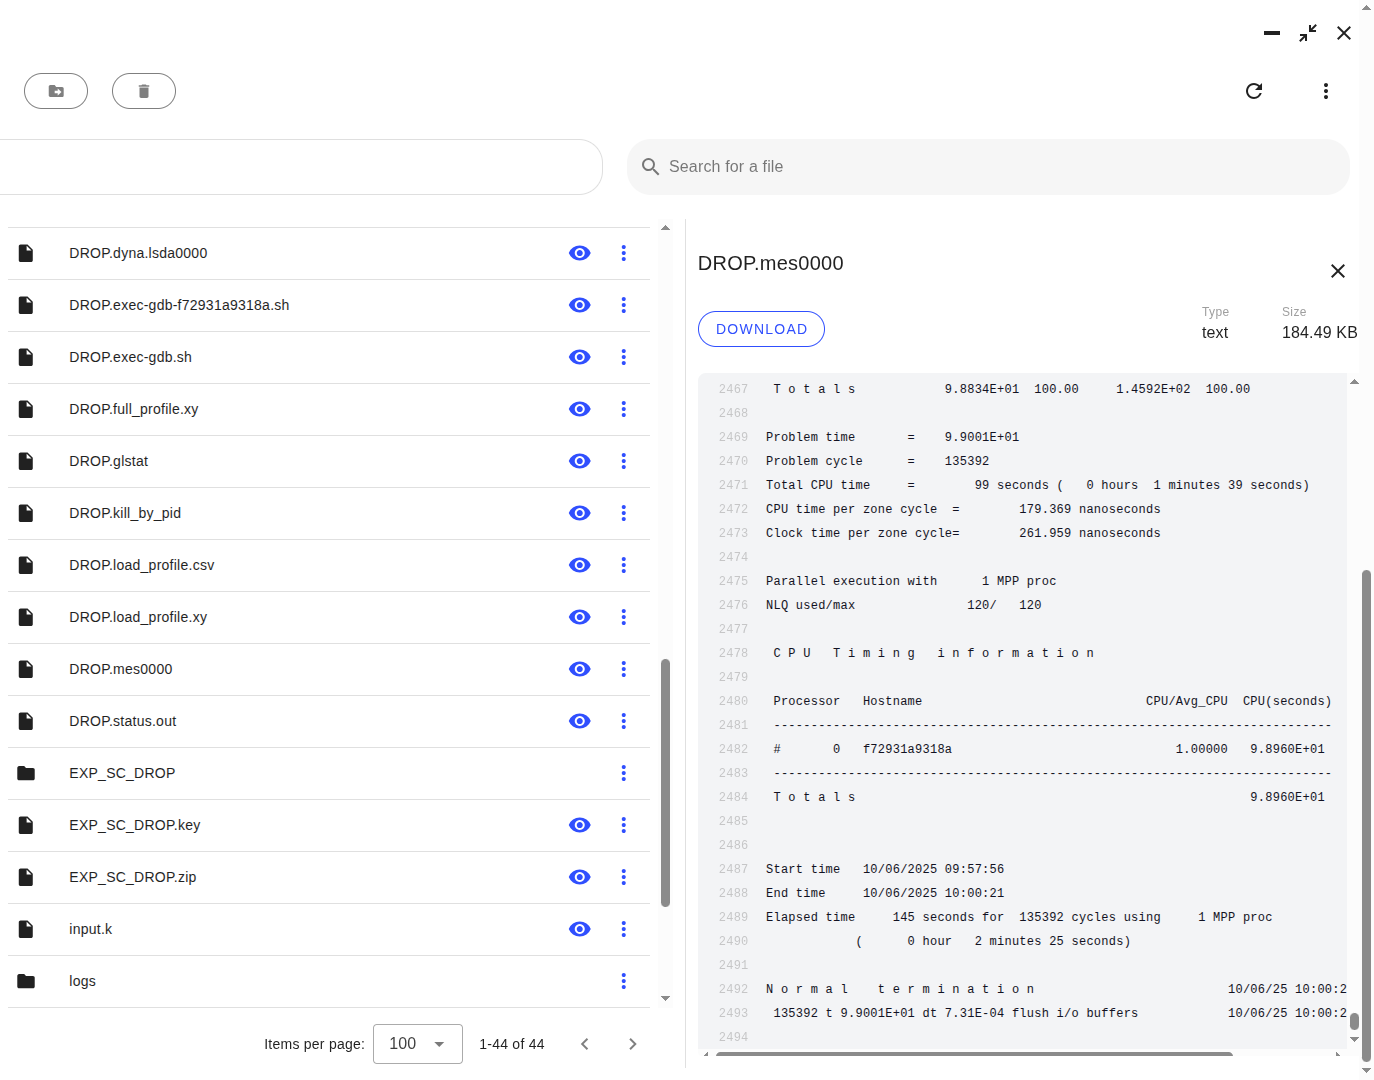
You should now have a dyna_drop_test-out folder in your working directory on your computer and a dyna_drop_test-out bucket in Tasq containing all the output files.
You can view directly on tasq some images and log files generated by the simulation that are in your output bucket.
Your results will be stored in the dyna_drop_test-out bucket and can be retrieved in three ways:
For a large quantity of files or more than 5gb of data, it is recommended to use rclone (Linux) or cyberduck (Windows). They are two open source S3 bucket management applications.
For this part, we will assume that you have already started a simple task on Qarnot.
It is also possible to launch several ls-dyna cases per instance. To do this, you will have to create a pool and then launch tasks in this pool.
Thus, there are two steps :
Before creating a pool with the Python SDK, a few steps are required:
Slots : Each pool can host X simulation at the same time. We're talking about slots.
Instances : A pool can include one or more instances. This involves defining how many instances, 28 or 96 cores, you want to use.
Below, you will find the python script to launch your first pool:
As you will have noticed, the input files are not sent at this stage, but later when you launch your tasks.
Once your pool is launched, the script will show in your STDOUT:
Before creating a pool with the Python SDK, a few steps are required:
This is where you start your task. So you will need an input bucket and an output bucket, they can be the same or unique per task.
However, you will not need to define a profile or a version of LS-DYNA because they are already defined in the pool.
The following python script should be used for each new simulation.
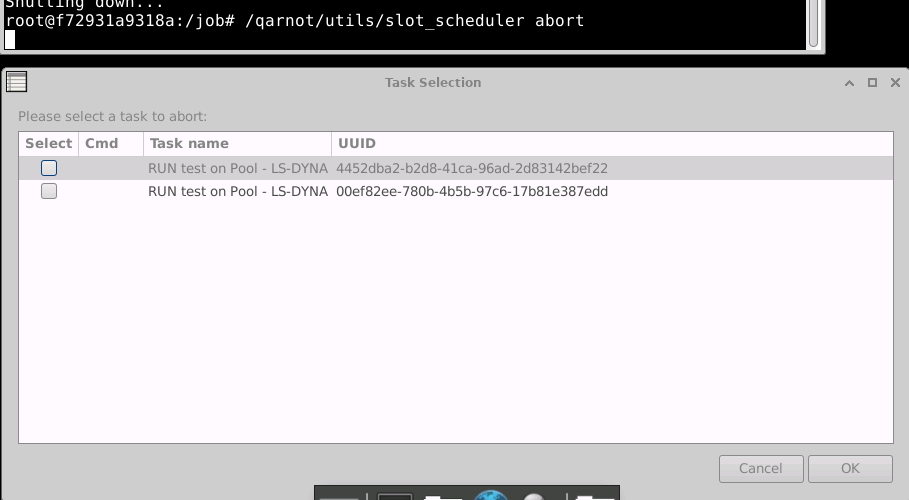
For pool's task, do not use the abort button on this task. Follow the guide bellow instead.
Once your pool is launched, you can cancel tasks using the following command: SCHED_UI=” true” /qarnot/utils/slot_scheduler abort
From the VNC link displayed after the pool is launched, you can launch a terminal and execute the command there. From the open graphical interface, you can select tasks and complete them by clicking the OK button.